Resources
It’s only required reading if you’re looking to level up your business knowledge. Check out our assortment of financial tidbits and case studies to see how Float can make things easier for your business.
💡 Looking for information on how to troubleshoot features in your Float account?
Visit our Help Centre for access to even more instructional articles and guides.

Float News
New! Bill Pay and Reimbursements
Float is the first business finance platform in Canada to offer an end-to-end solution that simplifies all non-payroll spending.
Read More
Case Studies
How BenchSci Saved 40+ Hours a Month Streamlining Spend Management with Float
Trailblazing AI firm, BenchSci shares why they chose Float for secure spend management at scale.
Read More
Case Studies
Health and Wellness SaaS Company Practice Better Closes the Books 6x Faster with Float
How the growing startup Practice Better leveraged Float to bring their spend management and bookkeeping in-house.
Read More
Case Studies
Creative Production Company Makers Chooses Float to Scale Spend Management
Makers shares how they cut their time spent reconciling transactions in half while empowering spend across the company’s project teams.
Read More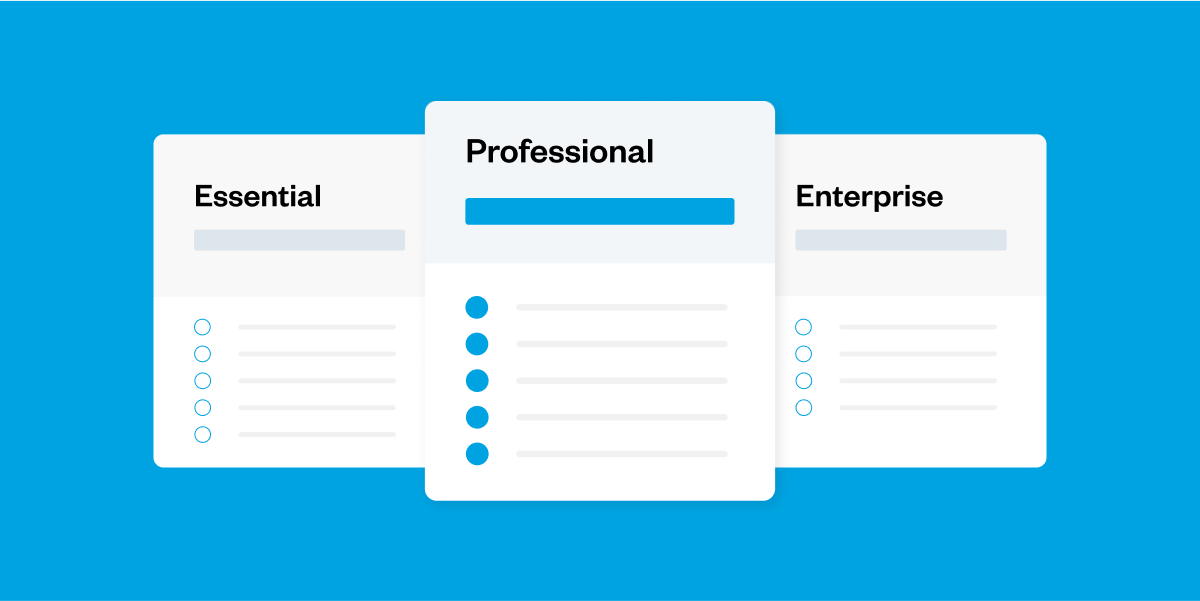
Product Education
Simple Pricing for Your Stage of Growth
Choose the Float plan that works best for your stage of growth (or figure out when it’s time to upgrade).
Read More
Float News
Float secures C$50 million in financing to accelerate growth
In partnership with Silicon Valley Bank (SVB), a division of First Citizens Bank
Read More
Float News
Save 7% on your Spend with Float
We asked over 200 customers across Canada how Float helps them save time and money. The results are in!
Read More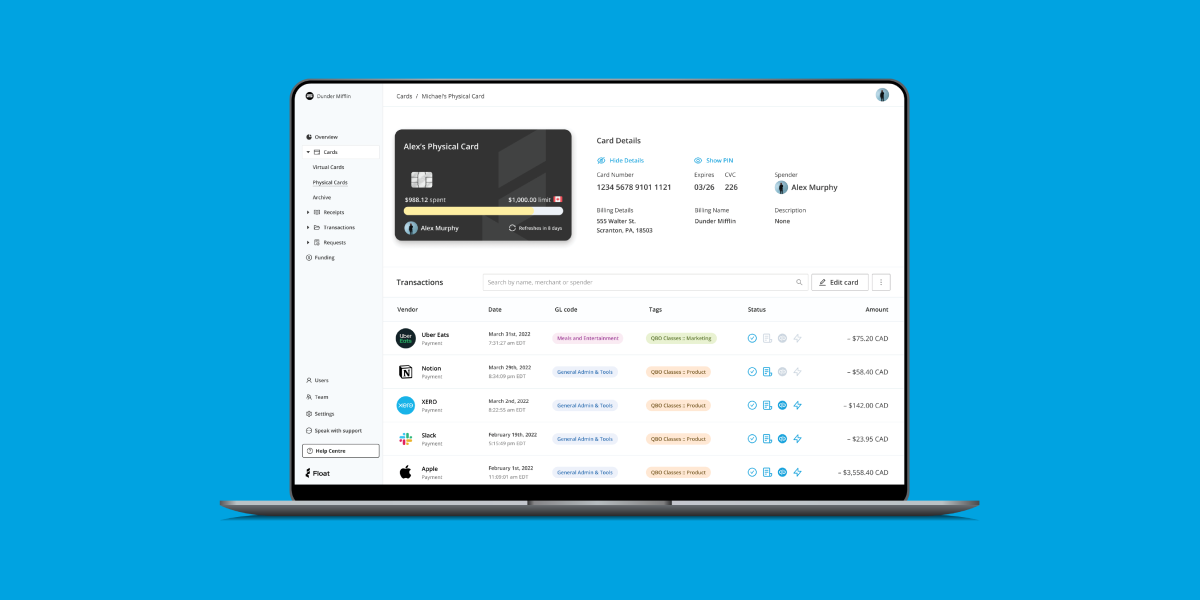
Product Education
A Better Way to Manage your Company Subscriptions with Float
Learn how to audit and manage your company software subscriptions with Float
Read More
Case Studies
Seeking a Modern Solution: Fresh Tracks Canada Explores New Ways to Manage Spend
The travel agency turned to Float to drive efficiencies while empowering teams to spend across the company.
Read More
Product Education
Get export-ready faster with Float’s Accounting Workboard
Save on time and unwanted spend each month-end as you close the books.
Read More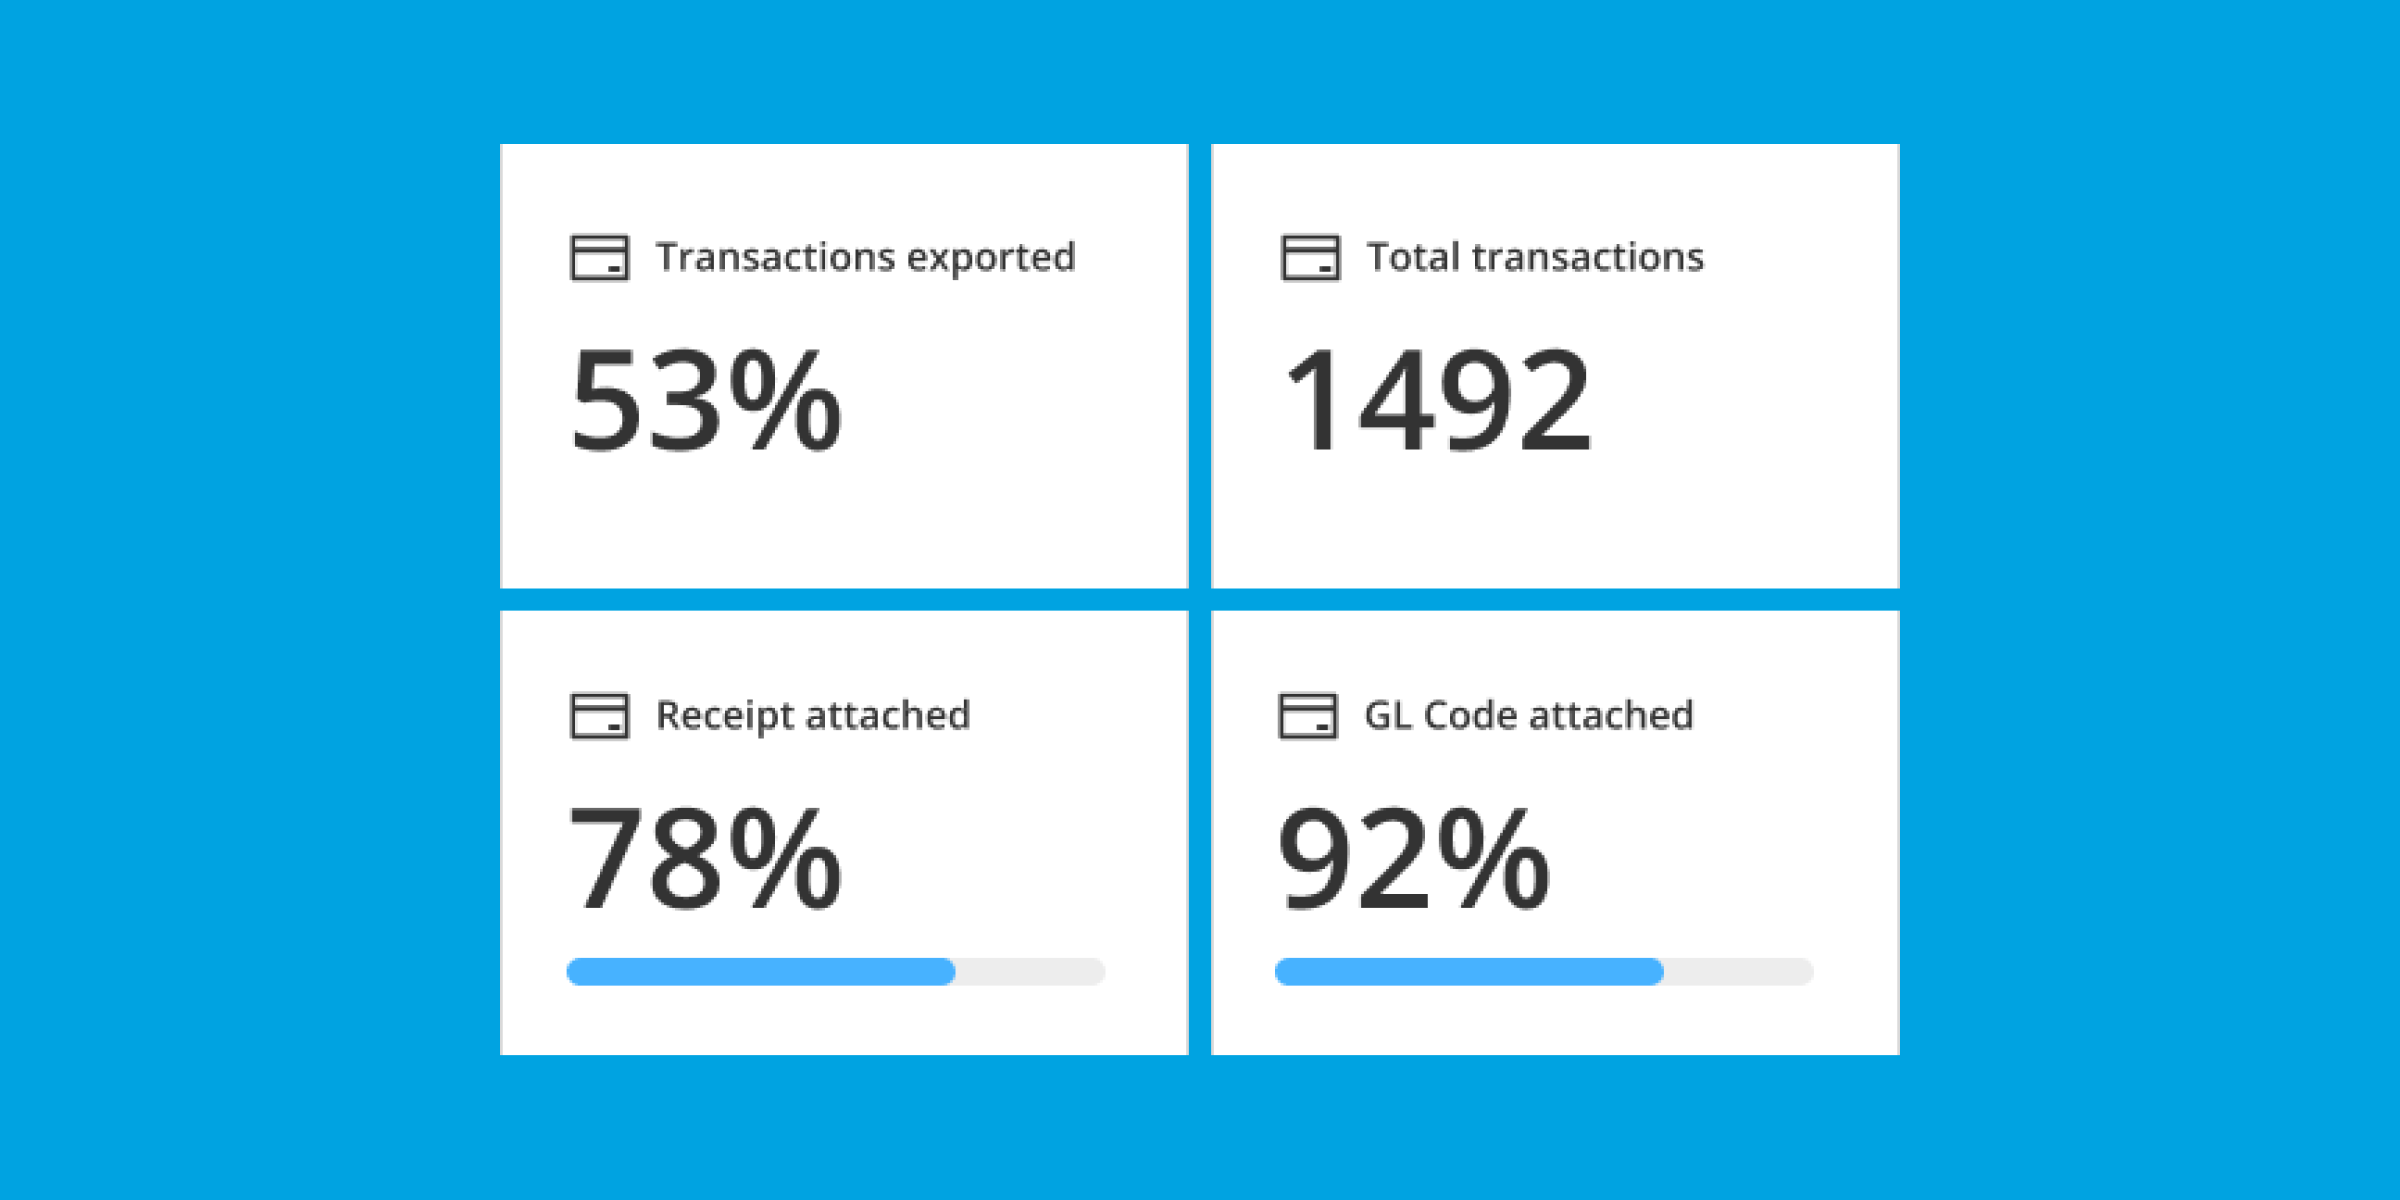
Product Education
Find Efficiency with Float’s Accounting Hub
A dedicated space to quickly review, automate, and export transactions at scale.
Read More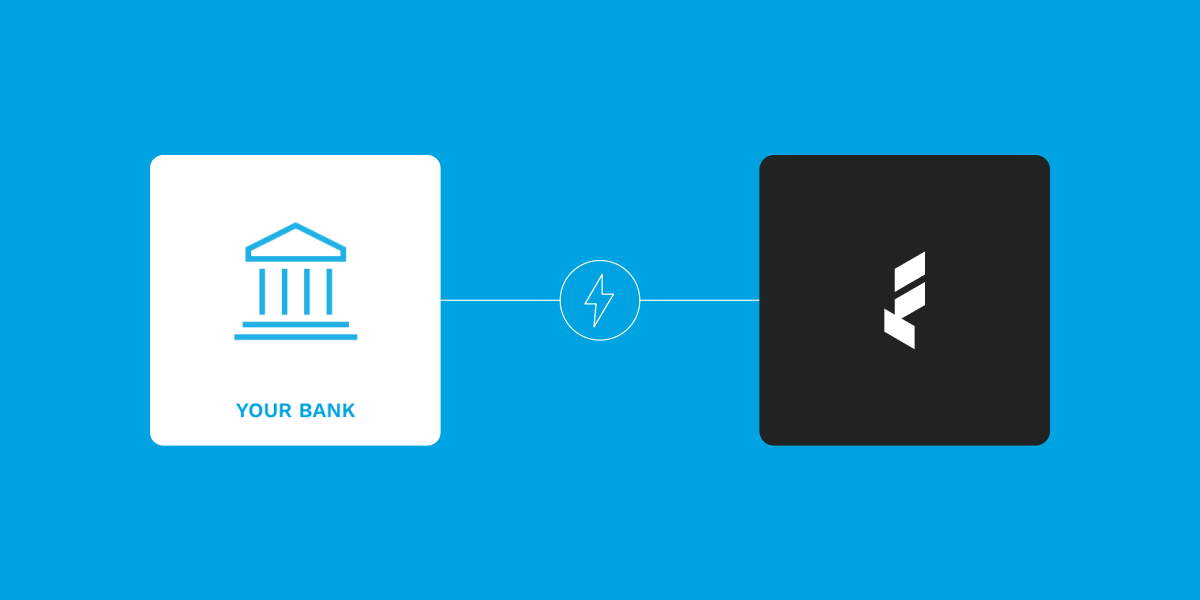
Product Education
Get Fast Transfers to Float
Reliable access to funds in Float with fast one business day transfers.
Read More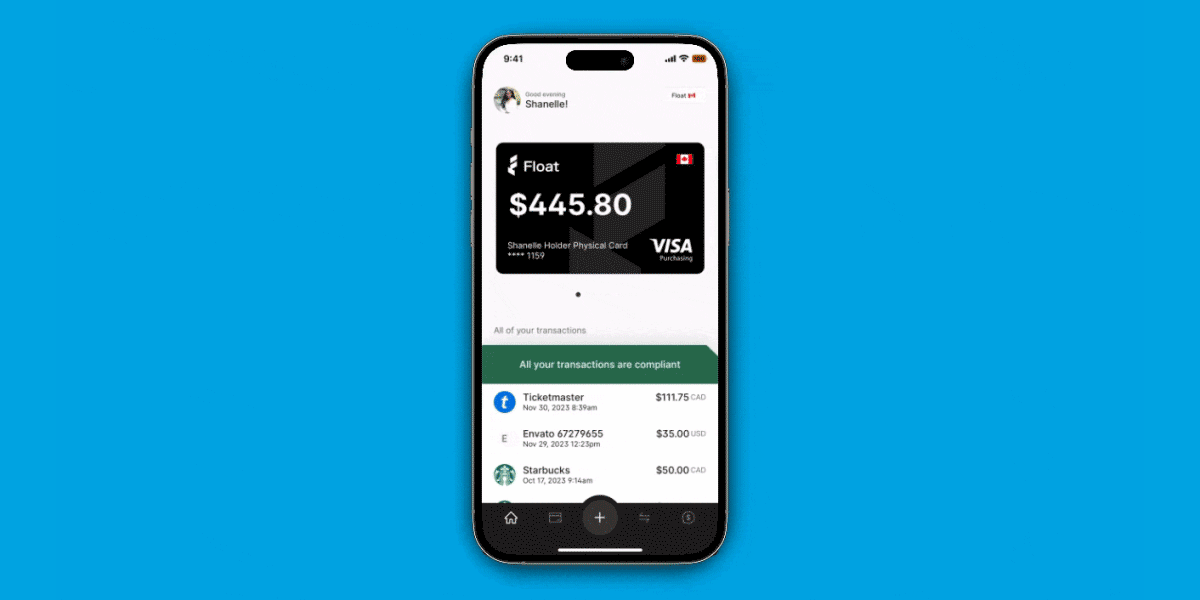
Float News
Introducing the Float Mobile App
Take your business spending on-the-go. Request new cards and reimbursements, capture receipts, and understand your spending power at a glance.
Read More
Product Education
The Month-End: November
What’s new at Float? Last month we launched our new Notifications Centre, earnings for Float Yield took effect, and we received our PCI-DSS certification. Read about it here.
Read More
Float News
PCI-DSS: From Compliance to Certification
Learn about our dedication to safeguarding sensitive data with our recent PCI-DSS certification audit and new spend control features.
Read More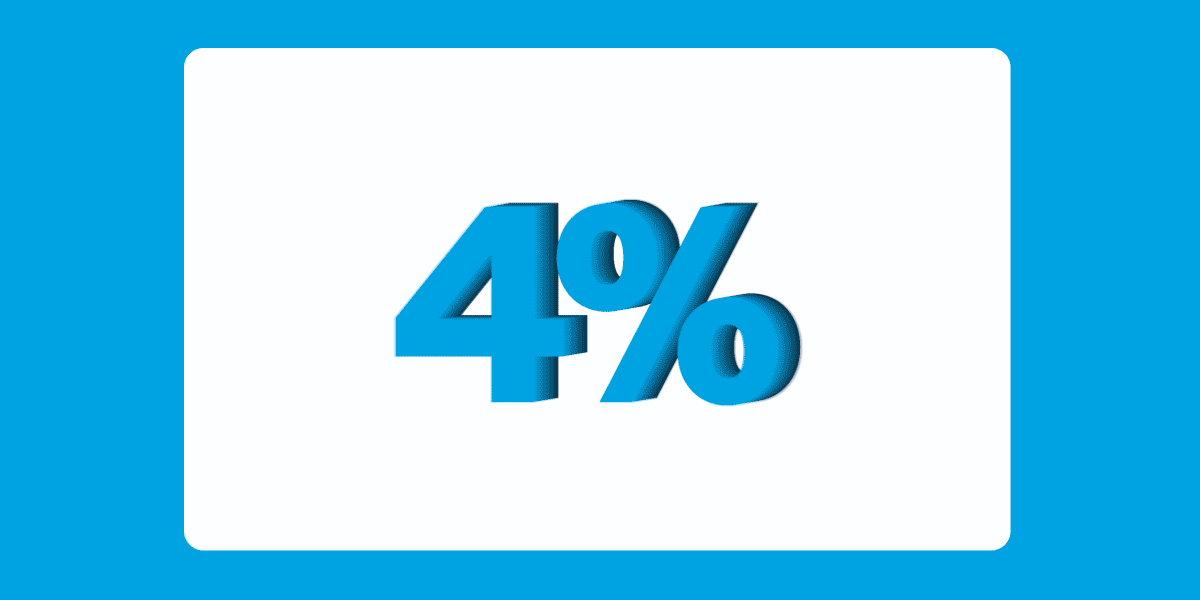
Float News
Float Launches Canada’s First High-Yield Product To Help Canadian SMBs Navigate Inflation Challenges
Earn up to 2.7x the interest rate on CAD and USD balances vs traditional banks
Read More
Product Education
The Month-End: October
What’s new at Float? Last month we expanded access to Transaction Splits, introduced new custom features to the Accounting Hub, and announced our much-anticipated mobile app. Catch up on these latest game-changers.
Read More
Case Studies
Feeding Efficiency: Fresh Prep Scales Their Spend Management with Float
As the meal-kit provider expanded operations, they turned to Float for a scaleable solution to manage company spend and empower employees nationally.
Read More
Case Studies
SPI Logistics Chose Float to Bring Their Vendor Payments Into the Digital-Age
How the leading logistics firm saves thousands per year (while tackling risk) by digitizing their vendor payments.
Read More
Product Education
The Month-End: September
What’s new at Float? Last month we revamped the Accounting Hub, enhanced our customers’ funding experience, and introduced Reimbursements. Catch up on these latest game-changers.
Read More
Case Studies
Black Feather Does Expense Management Differently with Float
How a Canadian wilderness adventure company transformed their expense reimbursement process with smart corporate cards for the whole team.
Read More
Float News
New! Simplify Employee Reimbursements with Float
Simplify your team spending by keeping it all in one place (including employee reimbursements).
Read More
Float News
My Float Face
Our new brand campaign focuses on the range of positive emotions people feel when using Float.
Read More
General Topic
3 Ways to Simplify Corporate Spend with Mobile Wallets
Learn how to enable team spend (with control) through smart corporate cards integrated with mobile wallets.
Read More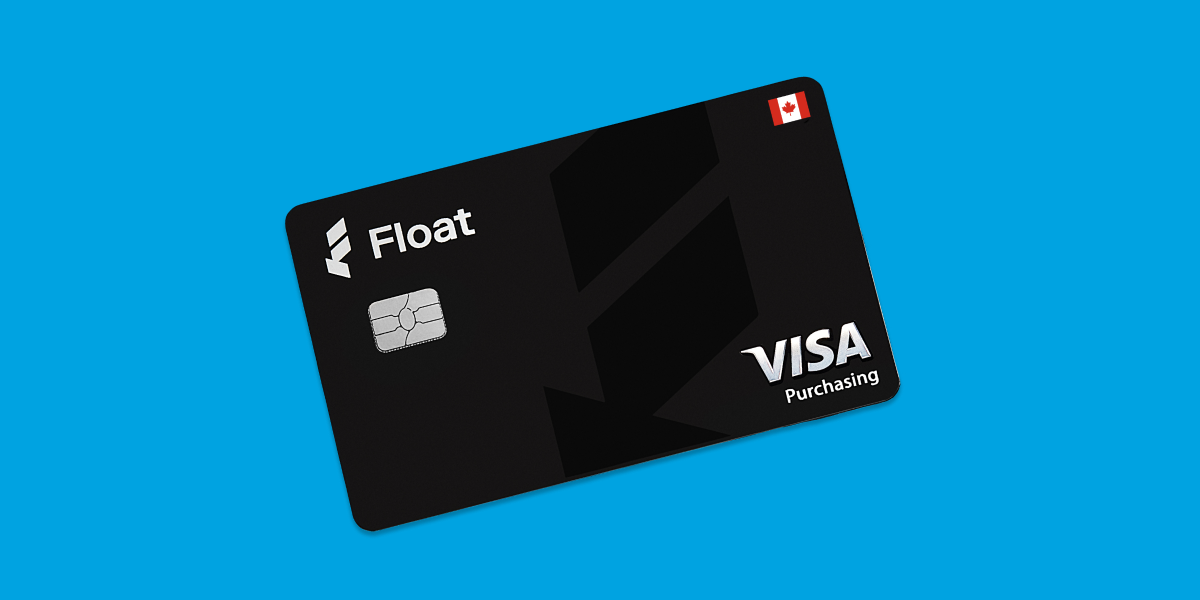
Float News
Control Employee Expenses with Float’s Latest Features
From Dynamic Approvers to a new HRIS Integration, Float’s latest features were built in Canada with ❤️
Read More
Product Education
What Makes Float Uniquely Canadian
Learn what sets Float apart as the modern business spending platform for Canadian finance teams.
Read More
Float News
It’s Official – Float is SOC 2 Type 2 Certified
Learn about our commitment to security and trust at Float with our recent SOC 2 Type 2 compliance audit and new spend control features.
Read More
Product Education
Introducing Float Cards 2.0
Meet the next generation of Float Cards that let you top-up card balances as purchases need to be made for worry-free company spending.
Read More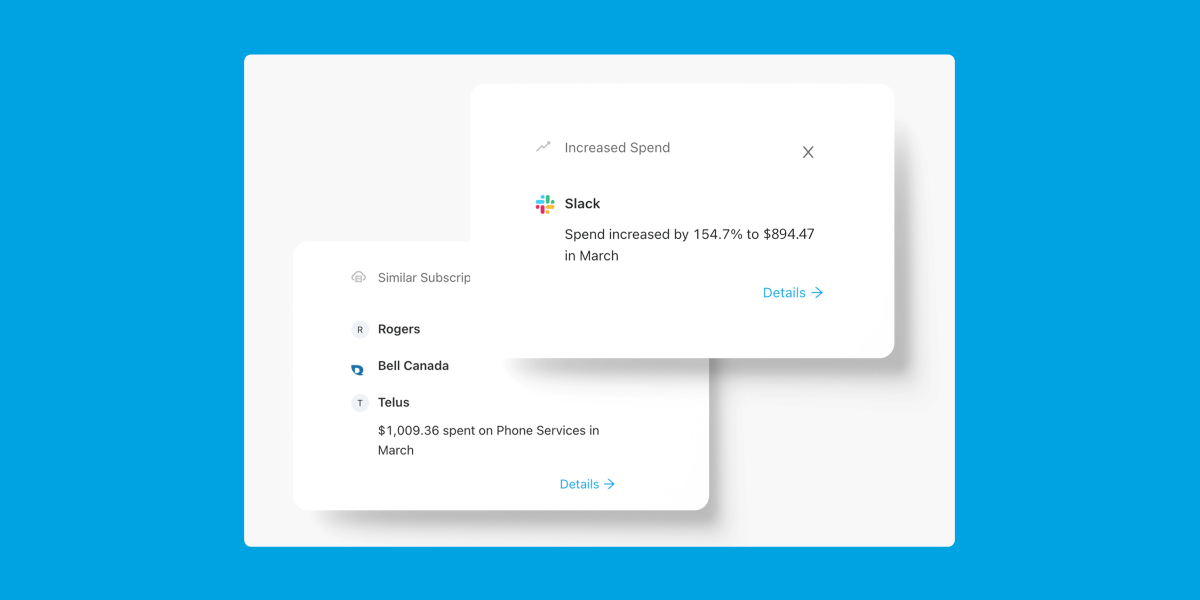
Product Education
Spend Less with Float’s Savings Insights
Get monthly suggestions on how to cut waste and save money on your company’s software spending.
Read More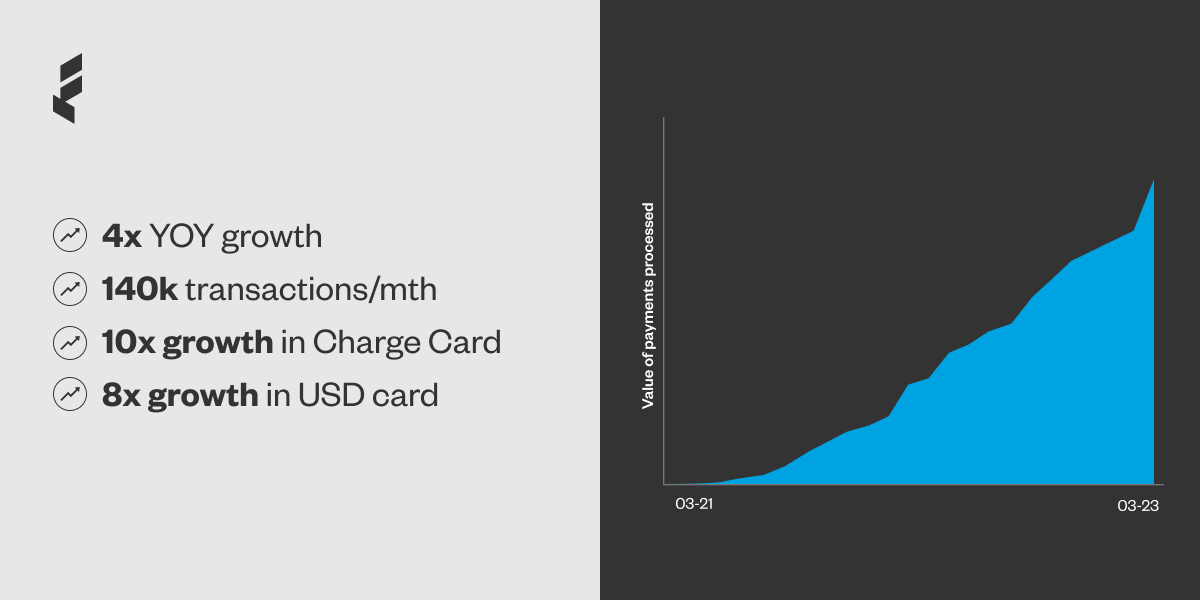
Float News
Float’s Revenue Quadruples in Strongest Year Yet
Float now serves thousands of customers, processing over 140k transactions monthly.
Read More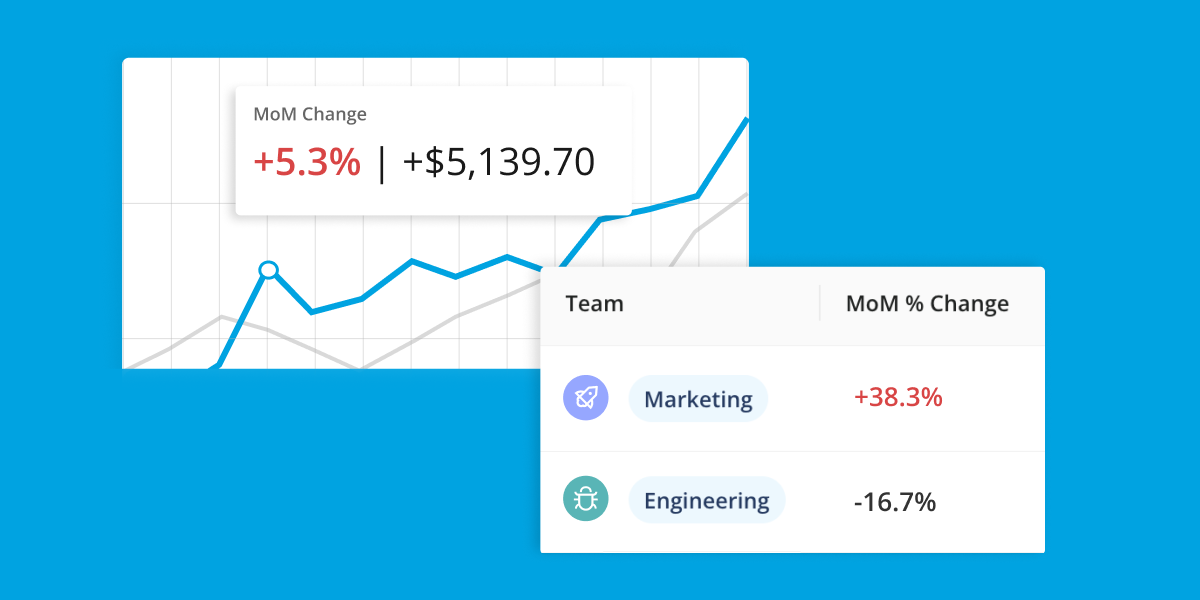
Float News
Get financial visibility with Float’s latest Reporting feature
Make data-driven decisions that drive savings with real-time visibility into company spending.
Read MoreFloat News
New! Transaction splits
Easily split card transactions and allocate different amounts to different accounts directly in Float ✂️
Read More
Case Studies
PolicyMe Turns to Float for Smarter Spend Management
PolicyMe needed a solution that gave them greater power and oversight over spending in their organization.
Read More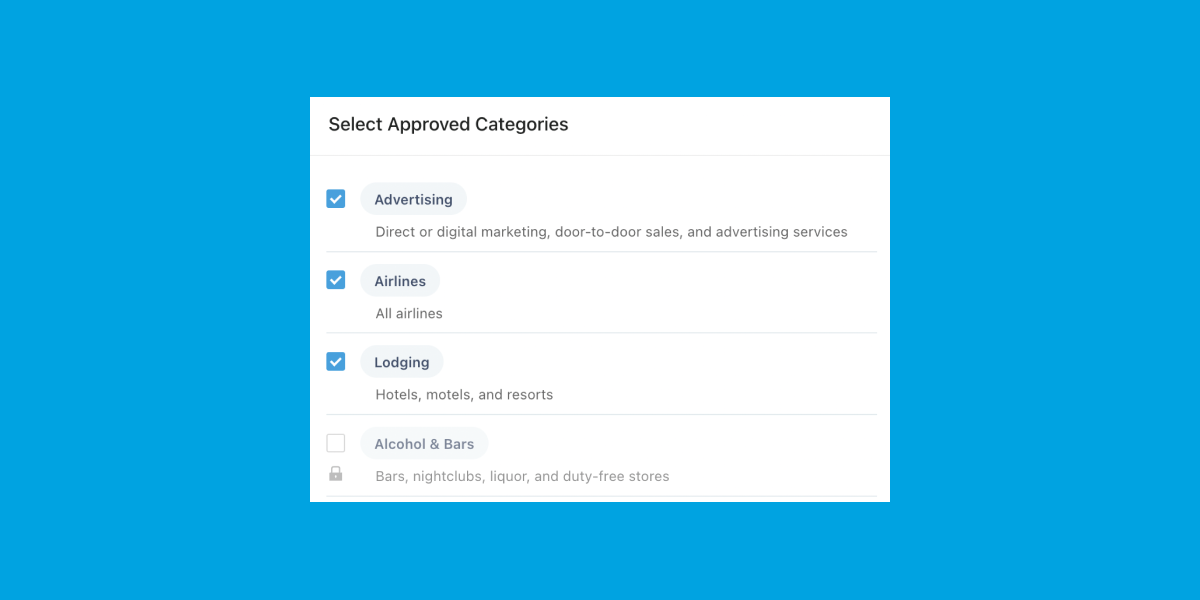
Product Education
Introducing Merchant Controls
Issue cards to employees worry-free by limiting their transactions to approved merchant categories.
Read More
Product Education
Maximizing Security with Float: 5 Proven Tips
Our Risk team’s round up of important tips to help keep your account and cards safe.
Read More
Float News
Float’s 2022 Product Roundup
As we close the books for 2022, it’s a great time to look back on what was accomplished and to create goals for the year ahead.
Read More
Case Studies
How Athennian Streamlines, Simplifies and Scales with Float
With a lean finance team and rapid employee growth this past year, Athennian knew they needed to level up their internal spend and expense management process.
Read More
Float News
Introducing Canada’s smartest corporate card for USD spending
Corporate spending just got a whole lot easier! You can now easily manage your USD and CAD transactions all in the Float platform.
Read More
Product Education
How Float Simplifies Financial Audits
Audits don’t have to be spooky. 👻 Our automated financial controls are designed to set you up for success and make this commonly dreaded process a lot less stressful.
Read More
Product Education
How Float makes expense reports a thing of the past
Wondering how to submit your expense reports in Float? Hint: You don’t! 😉 We’ve got something better and more efficient for you.
Read More
Float News
Introducing Retained Learnings
Hosted by Float CEO Rob Khazzam, our new podcast features interviews with forward-thinking Canadian finance leaders
Read More
Float News
New! SAML SSO login for Float
Set up SAML Single-Sign On for improved account security with Float.
Read More
Float News
New! Sync your expenses and receipts from Float to NetSuite
Float allows you to export transactions already coded and embedded with receipts directly to NetSuite.
Read More
Case Studies
How Forma.ai Found True Financial Autonomy With Float
When a single corporate credit card could no longer cut it, Forma.ai turned to Float and began to experience financial autonomy once and for all.
Read More
General Topic
Best Receipt Inbox Solution to Minimize Employee Chasing
Minimize Employee Chasing with a Better Receipt Inbox Solution. Float is putting an end to missing receipts and massive submissions at month-end.
Read More
Guides
Guide to a Modern Expense Policy
Guide to a Modern Expense Policy. Discover how effective practices that will revolutionize your business spending. Learn the benefits, types, and key components of expense policies, plus how automated solutions like Float can streamline your expense management process.
Read More
Case Studies
How Klue Found Its Way to Better Spending
An interview with Adrian Pape, VP Finance at Klue.
Read More
Float News
Dynamic Duo: Submission and Approval Policies
Use Float to automate your company’s expense policies for greater financial control.
Read More
Float News
Float’s New Smart Corporate Cards Are Here!
Looking for a smarter, more professional way to spend? Float’s new smart (physical) corporate cards have arrived!
Read More
Industry Insights
New Survey Reveals Pain Points in Spend Management
Angus Reid survey of Canadian Finance leaders reveals operational bottlenecks
Read More
Product Education
A Guide to Setting Up Teams and Multi-level Approvals
Use Float’s Team Management feature to set team-level and multi-level approval policies.
Read More
Product Education
How It Works: Float’s QBO Integration
Float offers a powerful two-way integration with QBO.
Read More
Product Education
Float Bookkeeper Guide
If you are a Bookkeeper that has a client (or hopefully clients!) using Float, this guide is for you! Learn about how to export Float transactions to your accounting software.
Read More
Industry Insights
Why Better Corporate Spending Starts With Strong Policies
They say if you follow all the rules, you miss out on all the fun. But when it comes to your financial policies, you’ll want to ensure your team knows every single one!
Read More
Case Studies
Float and Letterbox Doughnuts Make for the Sweetest Combo
Letterbox Doughnuts was growing fast, but with all that dough coming in they needed a solution to keep up a pace with all their expenses. Donut worry, Float saved the day!
Read More
Product Education
Why You Should Create a Separate Card for Each Vendor
Overcharged and Overwhelmed? Not on our watch. Float has designed a feature that allows you to easily manage transactions from ALL your vendors.
Read More
Product Education
3 Float Hacks You Should Know
Ready to level up your experience with Float? Don’t go anywhere – we’re about to let you in on all the tips and tricks.
Read More
Case Studies
Porta meets Float: A recipe for success
Finding the right corporate card when you’re launching a DTC startup can be challenging, but Porta avoided the hassle when they found Float.
Read More
Industry Insights
Back at It Again With Crazy Expense Write-off Attempts
We’re back with more insane expense write-offs submitted by a very ambitious group of employees.
Read More
Case Studies
Blue J Secures Corporate Spending With Float
Blue J was in search of speed, security and smarter spending processes and Float checked all the boxes.
Read More
Product Education
Better Expense Management with SMS Tracking
In a perfect world, expense management would be as easy as a simple text. And at Float, that’s exactly the world we’re living in! 😉
Read More
Industry Insights
3 Common Misconceptions About Corporate Cards for Startups
We’re here to clear the air on some of the most common misconceptions around corporate cards so you can spend smarter and scale. 🚀
Read More
Float News
Product News: Introducing Float’s Slack Integration Feature
What if we told you that issuing corporate cards, requesting spend approvals and managing corporate expenses across departments was all possible at the click of a button?
Read More
Case Studies
Nerva’s Accidental Find Turned Treasure
After stumbling across an ad, Nerva quickly became a proud user of Float. Now, they’re saving more time than ever before and have access to all the corporate funds they need.
Read More
Product Education
Closing Your Books Faster at Month End
Float’s management software helps users effectively manage their corporate spending and closing books faster by providing automation, collaboration and integration.
Read More
Case Studies
The Ultimate Trade: Coinberry Leaves Amex for Float Spend Management
We sat down with Jerry Lin, VP of Finance at Coinberry, a crypto trading platform that gives Canadians a safe and reliable way to purchase and sell their cryptocurrency.
Read More
Product Education
How Float Promotes Greater Transparency in the Workplace
Whether you’ve been in business for 30 years or are in the early stages of a startup, financial transparency on spend management and budget tracking is always a top priority – especially when it comes to spending.
Read More
Product Education
Spring Cleaning Your Finances With Float
Spring has sprung! Out with the old and in with the new – starting with your spend and expense processes.
Read More
Product Education
A Quick 1:1 With Float’s Own Finance Manager
Hi, I’m Jennifer McNamee. 👋🏼 The Finance Manager at Float who handles all of the corporate cards floating in our company.
Read More
Case Studies
Giving Clutch a Better Way to Spend
At Clutch, bookkeeping and reconciliations have never been easier – all thanks to Float.
Read More
Industry Insights
Three Startup Challenges You Should Axe This Year
We’re always up for a good challenge. That’s why when we see Canadian SMEs struggling to spend smarter, Float’s ready to step in.
Read More
Industry Insights
A Few Ways To Show Some Love To Your Finance Team
It’s February and love is in the air, and you know who needs it most? Your finance team.
Read More
Industry Insights
Why You Need a Better Way to Track Employee Receipts
Tracking receipts. It can feel like climbing Everest – unless you’re doing it the right way.
Read More
Product Education
3 Signs Your Team is Ready For a Float Card
Ideas are flowing💡, the team is growing👫 and you need a better solution to manage and track your spending.💸 You’re in the right place.
Read More
Industry Insights
A First-Class Ticket to Managing Corporate Travel Expenses
Managing travel expenses is not exactly a “vacation.” In fact, if finance teams are doing things the manual way, the entire department may need a real getaway to recover from it all.
Read More
Industry Insights
The Most Bizarre Business Expenses Ever Submitted
Are you in for a good laugh? Read along for some of the funniest, most outrageous business expenses ever submitted – some that were even approved!
Read More
Industry Insights
Three Ways to Engage Your Virtual Team This New Year
With more people shifting to a hybrid work environment and virtual teams spanning the globe, managers need to take those extra steps to keep everyone engaged, connected and on the ball this new year!
Read More
Industry Insights
What Is a Decentralized Organizational Structure?
We’re seeing a spike in companies moving away from a centralized structure to a more decentralized one. When decision-making is shared, amazing things can happen. Here’s why.
Read More
Industry Insights
Why Virtual Cards Are More Secure Than You Think
Virtual cards. What are they?
Read More
Industry Insights
Let’s Make Smarter Spending Your 2022 Resolution
Manual spend management tools are time-consuming and prone to error. With a near year around the corner, it’s time for a fresh start! Allow us to introduce you to a better, more efficient way to track and manage your spending with smart spend software and virtual corporate cards.
Read More
Float News
Upcoming Release: Team Management
One of the biggest platform upgrades in Float’s history is almost here and we are excited to let you in on all the fun. Drum roll please… 🥁
Read More
Product Education
Say Goodbye to Year-End Headaches With Automated Expense Software
The whole point of year-end accounting is to ensure that your financial data is up to date and recorded correctly. So why are so many companies sticking to archaic year-end processes that do more harm than good?
Read More
Product Education
Holiday Spending with Float
It’s the most wonderful time of the year! The holiday season is upon us and our team at Float is excited to reflect on this past year, celebrate our milestones and prepare to hit the ground running in 2022. 💪
Read More
Float News
Announcing Float’s US$30M Series A Financing
We’re excited to announce that Float has closed US$30M in Series A financing led by Tiger Global.
Read More
Industry Insights
It’s Time to Wave Goodbye to Expense Reports. Here’s Why.
Startups are growing at high speed and the last thing they need is something to bog them down. That’s why startups across North America are beginning to see the value in eliminating time-consuming, manual processes and making way for more innovative and efficient tools.
Read More
Industry Insights
How to Create a Healthy Budget For Your Startup
The way you budget determines the survival of any startup. It’s the key to innovation, growth and expansion and should be at the top of everyone’s list.
Read More
Industry Insights
Why Is It Important to Track and Control Your Expenses?
Properly managing your expenses today is one step startups can take to protect their future.
Read More
Industry Insights
How Startups Can Effectively Scale Their Teams
Demand is increasing, revenue is flooding in and your startup is on the path to unwavering growth. Now’s the time to ask yourself, is your team equipped to handle growth at full speed?
Read More
Industry Insights
Why You Should Split Your Business Expenses From Your Personal Expenses
One of the most common errors new businesses make is blurring the lines between personal and business expenses. Here’s a few (good) reasons to keep them separate.
Read More
Industry Insights
How to Promote a Healthy Spending Culture in Your Company
Financial stability in any organization is the result of having the proper processes, systems, policies and values in place. This is what many refer to as a “healthy spending culture.”
Read More
Industry Insights
Why Expense Management Automation Is a Good Idea
If you’re a company looking to streamline your financial processes, automated spend management software will flip your biggest pain points right on the head.
Read More
Industry Insights
What Is a Financial Controller and What Do They Do?
More recently, many startups are exploring new ways to automate their financial and accounting processes. But, how can they do this?
Read More
Industry Insights
U.S. Software Companies Are Now Charging Sales Tax: How Will This Impact Startups?
If you’re a Canadian startup who often uses U.S.-based software, then you’re probably wondering how this will affect the way you purchase, monitor and record these types of expenses.
Read More
Industry Insights
How Corporate Cards Can Benefit Startup Companies
Many startups often fail due to a lack of capital in their first year of operating. Corporate cards — physical and virtual — serve as a great tool to help startups effectively manage their growth, monitor spending and increase operational efficiency.
Read More
Industry Insights
What are Virtual Cards?
Unlock financial freedom with virtual credit cards! Instant access, customizable limits, and enhanced security. Control spending, shop worry-free online, and say goodbye to physical plastic. Embrace the future of smart spending today!
Read More
Industry Insights
Still Sharing Credit Card Details over Slack?
Sharing corporate card credentials creates admin overhead, security concerns and makes reconciliation harder.
Read More
Industry Insights
Escape Marketing Excel Hell
Do you still manage your spend on marketing campaigns using excel sheets? Then this is for you…
Read More
Guides
Bill Pay
Eliminate tedious AP processes and pay bills faster with the simplest way to manage company spend.
Download
Guides
Account Security 101
Our Fraud Team’s top tips and best practices for your Float Account security.
Download
Guides
Onboarding Overview
Float offers self-serve or human implementation – here’s an overview of what you can expect when choosing to onboard with
Download
Guides
Security at Float
Learn how Float keeps your business protected with the highest security and industry standards.
Download

Guides
Mobile App
Request new cards and reimbursements, capture receipts, and understand your spending power at a glance on the Float mobile app.
Download


Guides
Unified Login
Access Float using a single global login and quickly switch between businesses to manage finances across accounts.
Download
Guides
Reimbursements Team Onboarding
Download and share this PDF one-pager with your team to get them set up to start submitting out-of-pocket expenses in
Download
Guides
Reimbursements Quick Start Guide
Download our Quick Start Guide and get your team up-and-running in no time.
Download
Guides
Reimbursements
Manage all your team spending in one platform. Reimbursements is a simple way for teams to manage out-of- pocket expenses.
Download
Guides
HRIS Integration
Simplify employee onboarding and offboarding and sync your company’s HR system.
Download
Guides
Float Integrations
Simplify your spending with seamless banking, HR, and productivity integrations that scale.
Download
Guides
Transaction Reviews
Learn how to let managers review team transactions after they’re made.
Download
Guides
Spend Management Guide
Learn how to control your company’s spending with Float’s intuitive spend management software.
Download


Guides
Float Charge Card
Float offers 30-day terms with no interest in both CAD and USD (conditions apply).
Download
Guides
QuickBooks Online Integration
Automate your accounting with Float’s QuickBooks Online Integration.
Download
Guides
Float One-Pager
Share this pdf with your team for a high level overview of Float’s smart corporate cards in CAD and USD.
Download
Guides
Float Overview
Learn more about Float’s smart corporate cards and spend management software.
Download
Guides
Float Admin Guide
Learn how to get started with Float as an Admin and simplify your company’s business spending.
Download
Guides
Moving Spend to Float
The sooner you move spend to Float, the faster you can start saving.
Download
Guides
Spenders and Managers Guide
Learn how to use Float as a Spender or Manager at your company to request spend and make purchases.
Download
Guides
Float for Marketing Teams
Introducing a simpler way to manage marketing and advertising spending.
DownloadYour questions,
answered
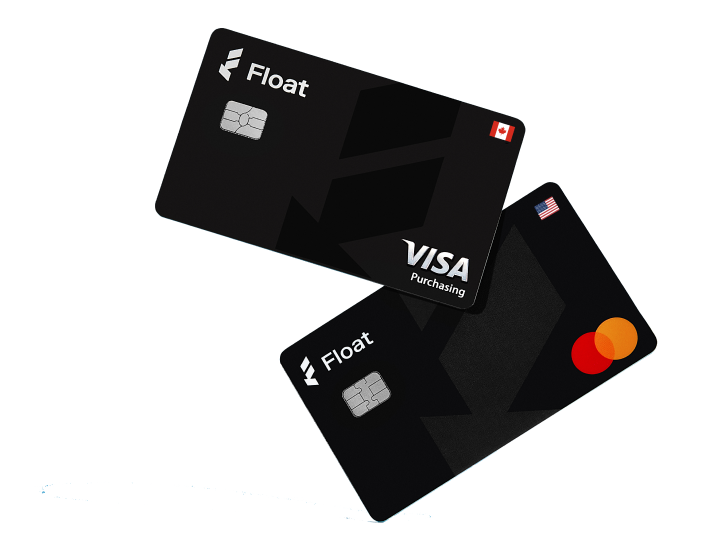
Float is an easier, smarter way to manage your business spending. Think of it as a combination of no-personal-guarantee corporate cards and intelligent spend management software to help you automate, control, and manage your company’s spending.
Float customers have access to physical and virtual corporate cards in both USD and CAD. Once you issue cards to employees, Float will collect receipts after every transaction. Each transaction is then automatically coded and matched with its receipt, ready to export to your accounting software.
Just like a ‘regular’ corporate card, our cards are used around the world anywhere VISA and Mastercard are accepted. With accounts in both CAD and USD, it’s easy to switch between the two currencies when you need to.
Physical and virtual cards work essentially the same way! Virtual cards act the same way as physical cards, in that you can use them for any spend where you need to enter in a card number. Virtual cards can be created instantly whenever you need them, and are perfect for online expenses like recurring expenses or ad spends. Both virtual and physical cards are linked directly to Float software with individual card controls to help manage spend.
Float offers personalized payment terms based on your business’s stage of growth. With Float’s Pre-funded CAD and USD cards, your limits = your bank balance. You can connect multiple bank accounts in CAD or USD, and even set up automatic top-ups to ensure your cards never run out of funds. With Float’s Charge card (CAD and USD), you can apply for up to $1M in unsecured 30-day credit terms that you can automatically pay down throughout the month.
Spend time and money
where it counts
Earn 4% interest on your cash balance and simplify business spend with corporate cards and expense management software.